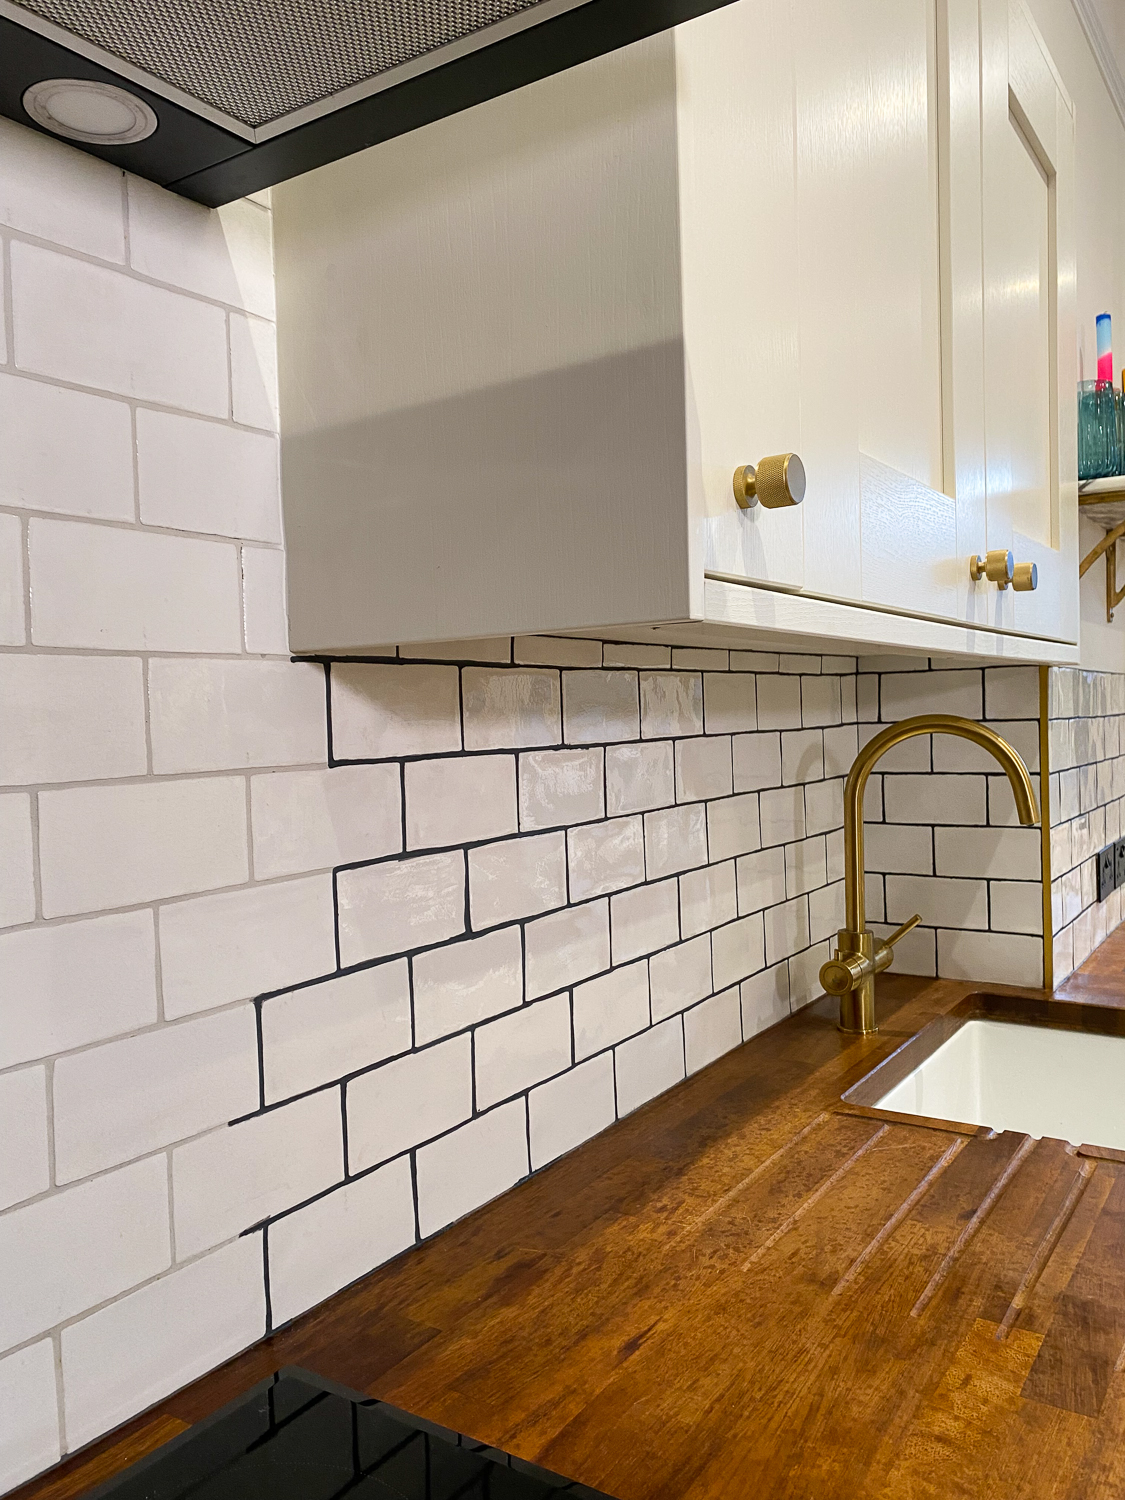
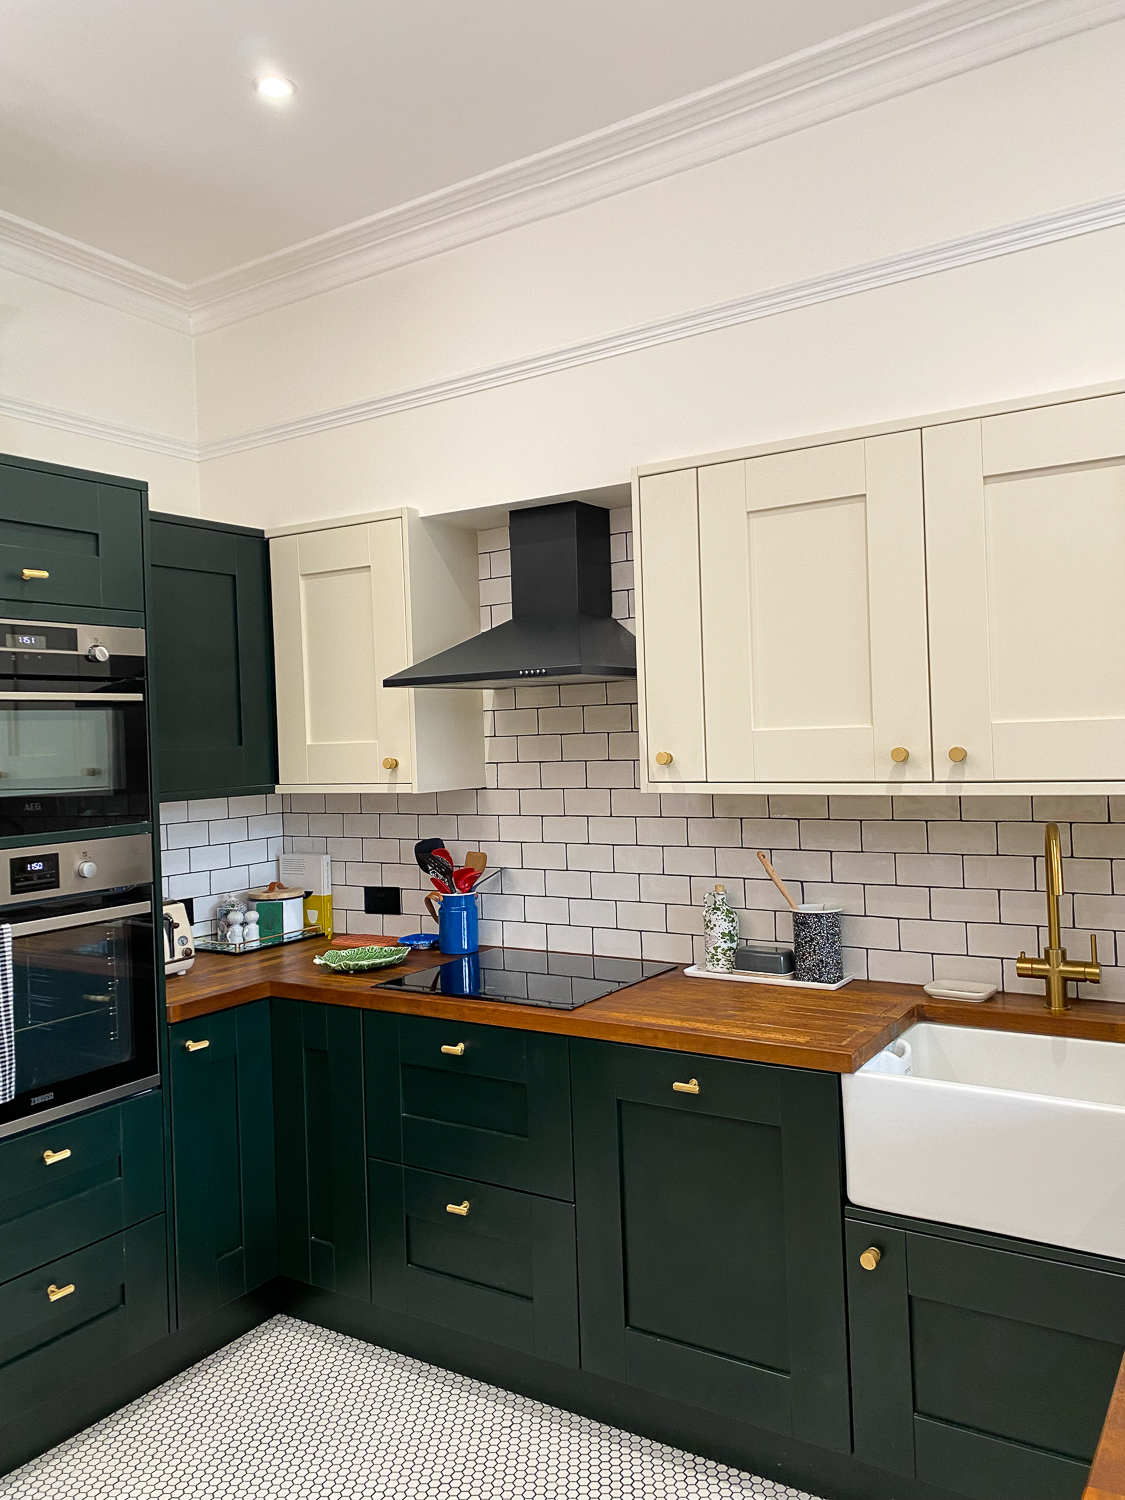
Everywhere in our home we have used dark grout with tiles. I love how it looks against a classic, inexpensive tile (see our bathroom here) and there’s the practicality of it not highlighting mould, stains and marks, especially in a high traffic area such as a family bathroom or kitchen.

So why didn’t you use dark grout in the kitchen I hear you asking? Well, we did, but we also used crackle glaze tiles – which we sealed! But only once – and the dark grout bled onto the tiles so badly that we had to tile an entire new layer over the section (because to remove them would’ve taken the plaster underneath off).
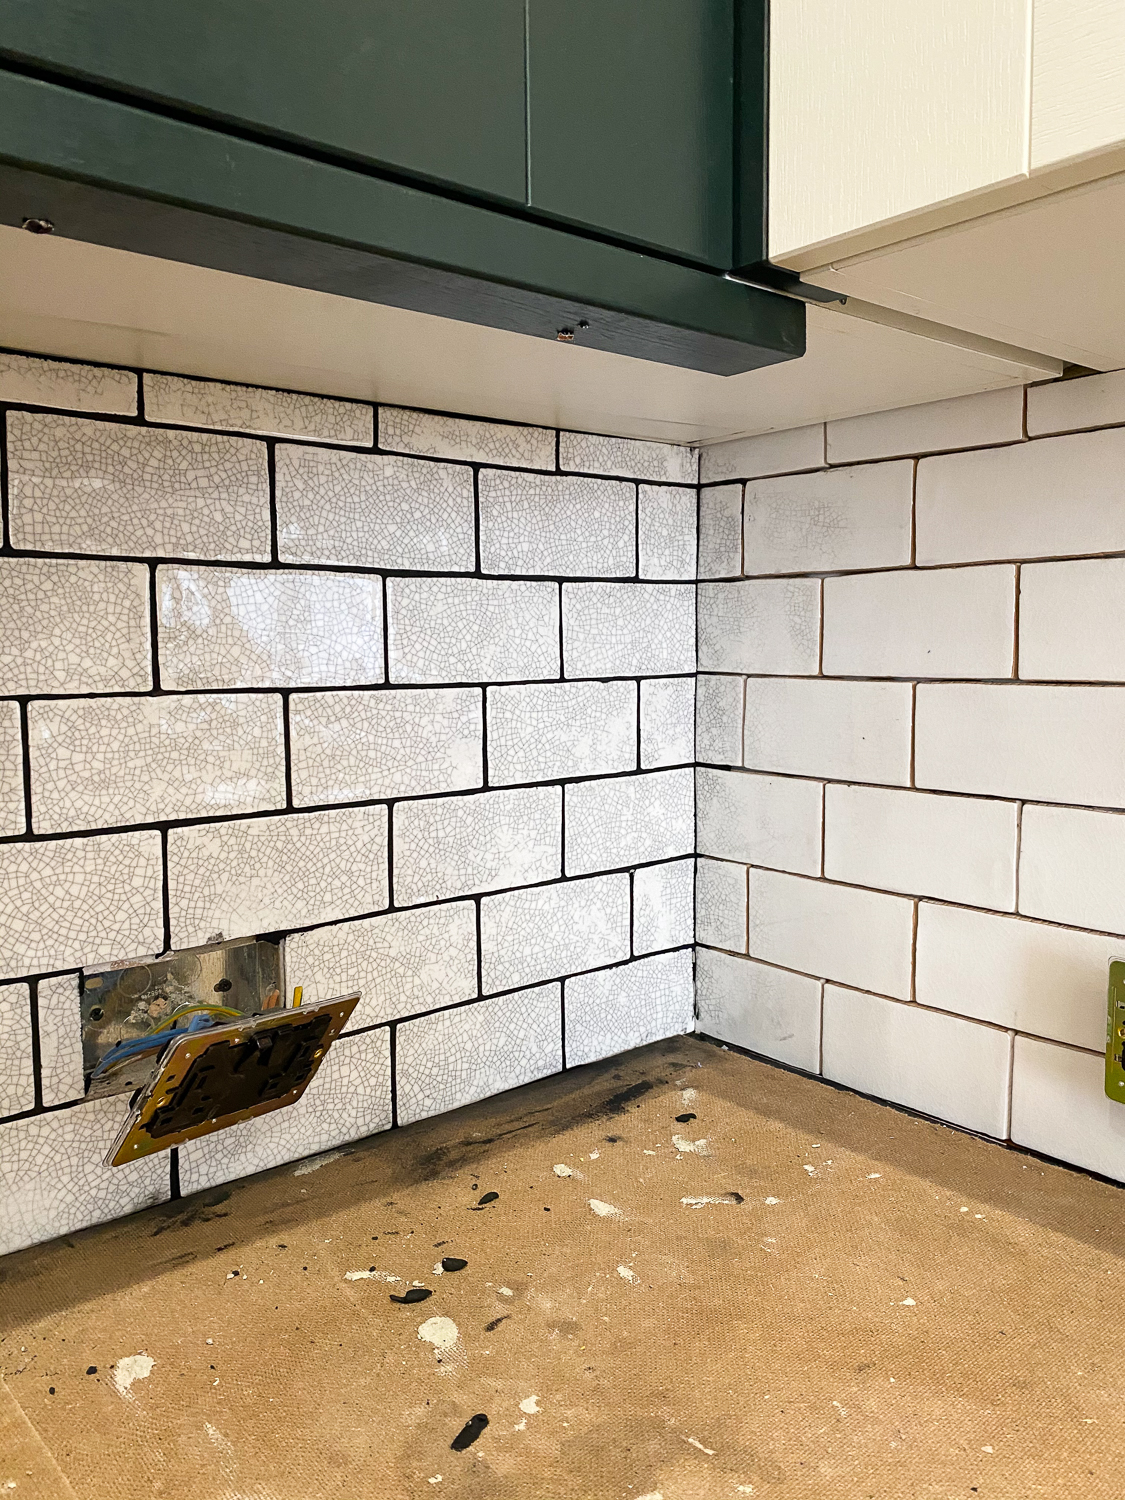
We then sealed them an extra three times to be sure but still got scared so just went with a light grey grout.

It was fine, they looked nice, but it just wasn’t my vision, you know? Our tiles (‘Ludlow’ in Ammonite from Porcelain superstore), in my opinion, would sing that little bit more with a darker surround.
I had been meaning to try a grout pen for ages, in fact I bought one (via Rainbow chalk) and it sat unused on my desk for ages – partly out of nervousness but mostly out of lack of time. But we have finally got round to it and here are the results!
It took a lot of getting used to at first, as we had gotten used to the lighter grout, but for me, the room instantly feels more ‘us’ and what we originally wanted – the tiles ping, as do the items leaning against the wall. Here are a few things to note:
I did not ‘prep’ the room or the tiles.
Our grout is reasonably recent (under 2 years) so it was in a good state, and our tiles were miraculously quite clean!
One pen will not do an entire room
Do not give it a go with just one pen (like me) if your space is as large (or larger) than this. I booked out an entire day and then ran out of juice (both metaphorically and literally!) after a couple of hours. In the end we used three pens for this area, I probably didn’t use the pen right until the last possible drip as it gets trickier to navigate and more room for error (and I was filming on a deadline so needed to be somewhat quick).
There are different size nibs
I used a 7ml one but they sell smaller and thicker (we accidentally bought a 15ml one and it was like a jumbo marker – we sent that one back).
The nib generally gets worn down and rough after a while
This means that your lines aren’t as smooth and it gets a bit tougher to make markings on the grout. That’s when you change pen.

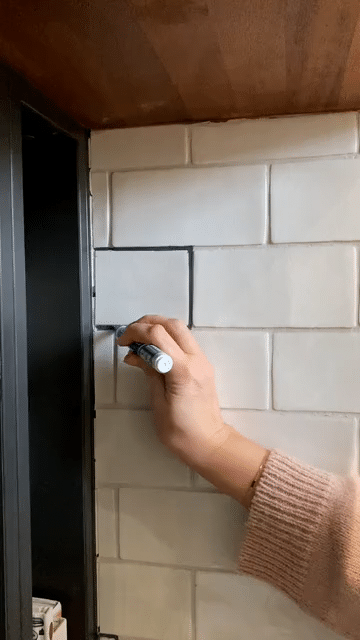
To use the pen you shake, then push down on the nib to bring the ink out (a bit like those gold pens we all used in school?!) – I would recommend having a notepad handy to do this as you go. If you push down straight onto the grout the nib will be ruined quicker (see above image!).
Try a tester area in a less visible part of the room before you start
Just in case you don’t like it! I tested it under the breakfast bar first.

Don’t worry if you go over the tiles
I generally had a damp flannel that ran over the edge of the tiles and would tidy up after it had initially dried.
I have not tried this in a bathroom or wet room and cannot say whether it’d hold up – a few people on TikTok have said it’s fine; a few haven’t! It seems less upholding on floor grout (for obvious reasons).
Make sure, if you have different tiles like crackle-glaze, that they are sealed before attempting this. Maybe three times to be sure! You can buy some here (and we found using a mini roller was a really quick and handy way to do this).

All in all, we are really happy with the result and it’s exactly what I ‘thought’ our tiles were going to look like when we first finished our kitchen. It’s worth mentioning that this is obviously freshly done and I can’t vouch for how long it lasts – but will of course share if there are any major flaws. If this was something you were considering (or maybe you hadn’t thought of it as an option before!), it’s a really affordable change you could make without too much effort.
See the grout pen in action on my TikTok home account